Are you looking to create a Gantt chart in Word for your next project? Look no further! With the right tools and a bit of know-how, you can easily whip up a professional-looking Gantt chart in no time.
In this article, we’ll walk you through the process of creating a Gantt chart in Word, step by step. From setting up your timeline to adding tasks and milestones, we’ve got you covered.

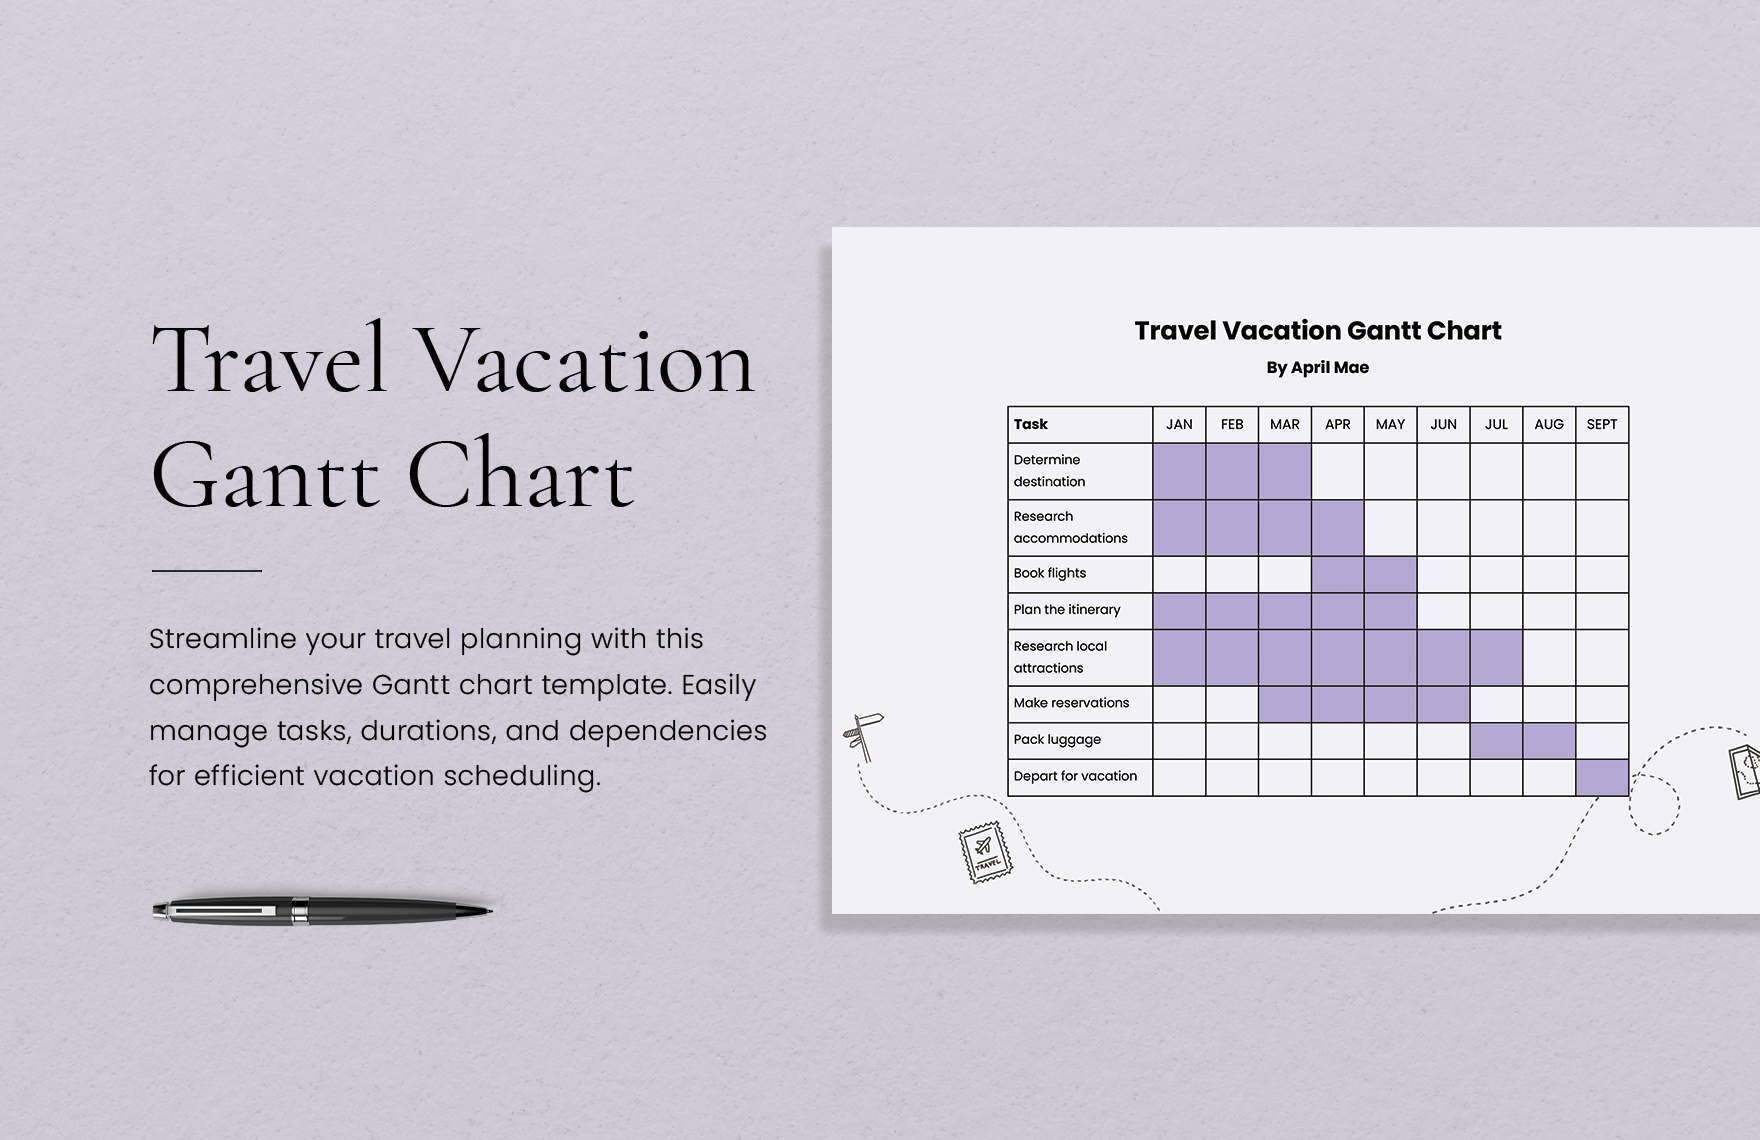
Gantt Chart Word
Creating a Gantt Chart in Word
First things first, open up Microsoft Word and create a new document. Go to the Insert tab and select Shapes. Choose the rectangle shape to create your chart’s timeline. Next, add text boxes for your tasks and milestones.
Once you have your basic layout in place, it’s time to add your tasks and milestones. Simply type them into the text boxes you created earlier. You can also customize the colors and styles to make your Gantt chart pop.
Don’t forget to add dependencies between tasks to ensure a smooth workflow. Use arrows or lines to connect related tasks and show the order in which they need to be completed. This will help you stay organized and on track throughout your project.
With your Gantt chart completed, you’re ready to impress your team with your project planning skills. Whether you’re managing a small team or a large-scale project, a well-designed Gantt chart in Word can help keep everyone on the same page and ensure your project stays on track.

How To Make A Gantt Chart In Word

How To Make A Gantt Chart In Word 8 Steps with Pictures

Free Gantt Chart Templates In Microsoft Word

How To Make A Gantt Chart In Word


